Problems with Import Files

Problems with Import Files

This could be happening for a number of reasons, but the troubleshooting process always started the same:

Contact your host and have them check your server』s error log. They will be able to see exactly why your server is rejecting your import file and they will know exactly how to fix it. There isn』t anything we can do to help until your host has checked the error log and we know exactly what the issue is.

Common Server Configuration Issues

Import files are usually rejected because the file you』re trying to upload exceeds your server』s hard limits on file size. Here are the most common hard limits that users encounter:

Maximum Upload File Size (PHP): This is set in php.ini with upload_max_filesize. It determines the maximum file size that your server will allow to be uploaded. This value must be larger than the size of the file you wish to upload to WP All Import.

Maximum Post Size (PHP): This is set in php.ini with post_max_size. It determines the maximum file size allowed to be used in PHP process. This should be set higher than upload_max_filesize.

Memory Limit (PHP): This is set in php.ini with memory_limit. It determines how much memory a script is able to allocate. This should be set higher than post_max_size.

"There's a problem with your import file."

This error is usually encountered when the import file is not valid. There are a number of common reasons that this may be the case:

No Import File: Open the URL in your web browser. It should either download or display a valid import file. If anything else happens then WP All Import will not be able to import the data.

Changed Import File: If the structure of the import file changes then WP All Import will no longer be able to find the data that it is supposed to import. You can either create a new import with the new file, or you can adjust the XPath setting in Import Settings ▸ Advanced Options, and then reconfigure your import in Manage Imports ▸ Edit Import.

Character Encoding: Sometimes the file in encoded in such a way that it may look valid but it』s really not. Other times, a file will declare that it is encoded in one way but really it』s encoded in a different way. Read more on our guide to character encoding.

Incorrect feed type detected: If you're downloading a feed via URL, and there's no file extension, it's possible that WP All Import will guess the incorrect file type. To fix it, you can add "#/" at the end of the URL, then put a fake file name with the real extension, e.g.: https://example.com/?action=getfeed&results=100#/feed.json

Does Not Pass Validation: There are pretty strict rules that XML, CSV, and JSON files must conform to in order for them to work. You can validate your data and URL using one of the following free online services:

XML: http://codebeautify.org/xmlvalidator

CSV: http://csvlint.io

JSON: http://jsonlint.com

Plugin & Theme Conflicts

Plugin & Theme Conflicts

Sometimes an issue can be hard to diagnose because it』s being caused by another plugin or your theme. Follow these steps to test for a plugin or theme conflict:

Deactivate all plugins other than WP All Import, WP All Export, and any WP All Import/Export Add-Ons you are using. If you』re importing data into WooCommerce, ACF, or something similar you should leave that plugin active.Switch to a default, unmodified, WordPress theme. If you』re using an add-on to import into a theme, you can leave the theme active.Run your import/export and check the results. If the problem no longer occurs then we know that one of the deactivated plugins or your theme is the cause of the problem.

If there is a conflict, then slowly begin reactivating your old theme and plugins and running the import/export. When the problem returns, whatever you just activated is the cause of the problem.

If you find that deactivating all other plugins and switching to a default theme does not fix the issue, then there』s no conflict. If this is the case, submit a support request and we』ll help you track down the cause of the problem.

Encoding & Character Sets

Encoding & Character Sets

XML Files Can Have Any Character Encoding

XML files can be saved with any character encoding. That character encoding should be defined at the top of the XML file, per XML standards on specifying the character encoding of an XML document.

If special characters in your XML file aren』t appearing correctly in the posts created by WP All Import, it means that the encoding specified in your XML file is probably incorrect – maybe your XML file is claiming to be a UTF-8 when it really is a Windows-1252, or similar.

If you're sure that your XML file is valid, it's not using UTF-8 encoding, and WP All Import is still rejecting it, try adding this code snippet inside your child theme's functions.php file (or in a plugin like Code Snippets):

add_filter( 'is_xml_preprocess_enabled', 'wpai_is_xml_preprocess_enabled', 10, 1 );
function wpai_is_xml_preprocess_enabled( $is_enabled ) {
return false;
}

CSV Files Must Be UTF-8 Or UTF-8 Compatible

Since there is no way to specify the character encoding for a CSV file, WP All Import just assumes all uploaded CSV files are UTF-8, which is the standard character encoding for the web.

This works the vast majority of the time, but if you are importing a CSV file with special characters (things like umlauts, non-Latin characters, etc.) and those special characters aren』t appearing correctly in the posts created by WP All Import, try opening your CSV file in a text editor using the correct encoding, and then re-save it using UTF-8.

On a Mac, our favorite way to do this is using Sublime Text 2.

Troubleshooting Guide

Troubleshooting Guide

Is WP All Import not working as expected?

This process will solve pretty much any problem you』re having:

Make sure you are using the latest versions of WordPress, WP All Import and any add-ons and other plugins you have installed. You can get the latest versions of WP All Import and its add-ons in the customer portal.Eliminate other themes and plugins as the potential cause of a conflict. Deactivate all other active WordPress plugins and activate the WordPress default theme.Test out your import on our debugging server. If the import works on our debugging server, but not on yours, you know it』s a problem on your end – most likely with your server settings.Ask your host to check your server』s error log to see if something is stopping WP All Import from working properly. Often, artificial limits on script execution time or MySQL queries prevent WP All Import from finishing imports. Read our guide on terminated imports.

Common Issues

Drag and drop not working? Admin screens look strange? 

First, try clearing your browser cache or using a different web browser. If the problem persists, the issue is usually a theme or plugin conflict. Improperly coded WordPress themes and plugins may load their own JavaScript or CSS files on WP All Import's admin screens, potentially breaking them. See our guide on testing for theme and plugin conflicts: Plugin & Theme Conflicts.

Can』t get from Step 1 to Step 2, Step 2 to Step 3, etc?

Broken PHP session settings will prevent you from being able to move between the different steps of the import process. If you suspect this is the cause, you』ll need to contact your host.

Running in to a Security Check error?

Clear your browser cache or try using a different browser.

Trying to increase import speed?

Read our guide on slow imports.

Import isn』t finishing?

Read our guide on terminated imports.

Concerned your server isn』t properly configured?

If your imports complete successfully, your server is properly configured. If you』re not able to successfully complete an import, it may be that your server is missing necessary components.

We』ve put a lot of effort into getting WP All Import to function on as many different server configurations as possible, and generally speaking, if WordPress works, WP All Import will work.

WP All Import server requirements:

PHP 5.4 or greaterMySQL 5.5 or greatercURLlibxmlSimpleXMLxmlreaderxmlwriterZipArchive

These are all commonly found on servers provided by the vast majority of hosts.

For a list of web hosts that are confirmed to work great with WP All Import, see our recommended hosts page.

File uploads acting weird? Strange caching issues?

Issues with caching can be hard to diagnose. Often they will show themselves if you upload a new import file but WP All Import shows you an older, unrelated import file. There are other symptoms as well, but this is the most common one.

If you』re having a problem with WP All Import and use some form of server side caching, try your import on one of our testing servers. If you aren』t able to reproduce the problem on a testing server, the issue might be related to your caching configuration. We especially see these types of issues with users hosted by WP Engine and Pantheon, or when Varnish tries to cache admin pages.

If you are able to successfully run your import with caching disabled, work with your host to figure out how to configure their caching so that when WP All Import asks for a file or makes a SQL query, the correct result is returned instead of an incorrect, cached result.

Other strange behavior?

Broken WP All Import database tables can stop the import from working correctly.

Try restoring the database tables form a backup, or deleting the WP All Import database tables and reinstalling WP All Import (you will lose all of the data associated with your previous imports).Deactivate and reactivate WP All Import.Test on a fresh WordPress installation with a newly created MySQL database.

Nested, Hierarchical Taxonomies

Nested, Hierarchical Taxonomies

WP All Import provides two options to import hierarchical or nested taxonomies, also known as 「parent」 and 「child」 taxonomies.

Example A

If you have a file where the taxonomy structure is specified in a single column or element, use 「An element in my file contains the entire hierarchy」.

Example – you have a column in your file with the value 「Ski Resorts > Colorado > Aspen > Aspen Highlands」

Ski Resorts is the parent, Colorado is a child of Ski Resorts, Aspen is a child of Colorado, and Aspen Highlands is a child of Aspen.

Nested Category Example

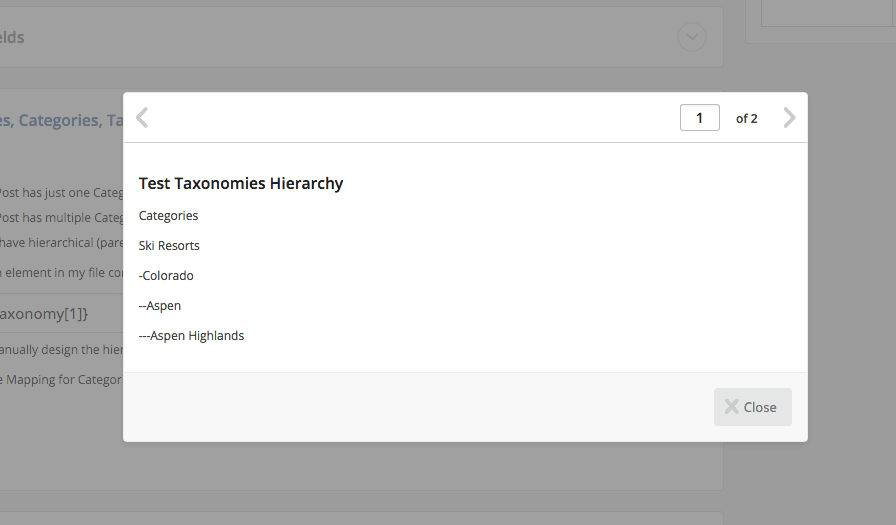
Click the Preview button to see what your taxonomy structure will look like after it is imported.

Nested Preview

Example B

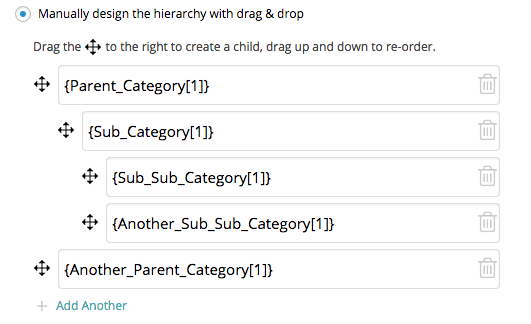
If you have a file with many different columns or elements containing your taxonomies, choose the 「Manually design the hierarchy with drag & drop」 option.

Drag the four-pointed arrows to the left or right to make a category a parent or child, or drag up and down to re-order.

Drag and Drop Example

Taxonomy Meta & Images

Taxonomy Meta & Images

Most often you will want to import categories and tags and other taxonomies as part of an import that is creating posts. There are times, however, when you will want to import just the taxonomies on their own. This is especially helpful when you have meta like images, custom fields, and content that need to be imported into the taxonomies themselves. This is only possible by creating an import for taxonomies.

Just like posts, you can import new taxonomies, or you can add meta and content to existing taxonomies.

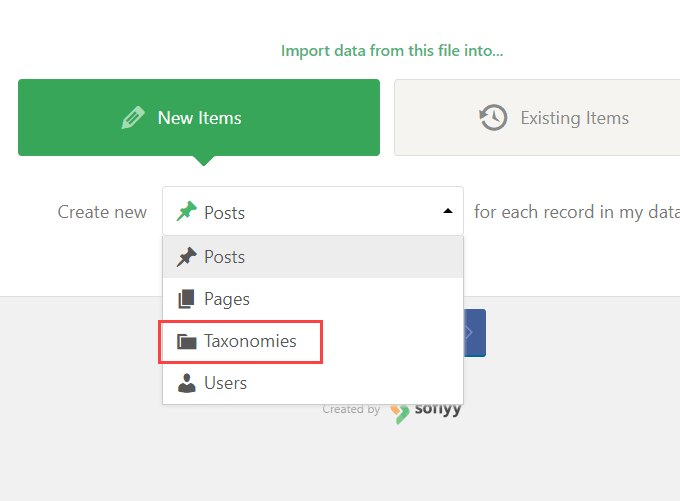
To get started, select 『Taxonomies』 in Step 1:

Taxonomies in drop down

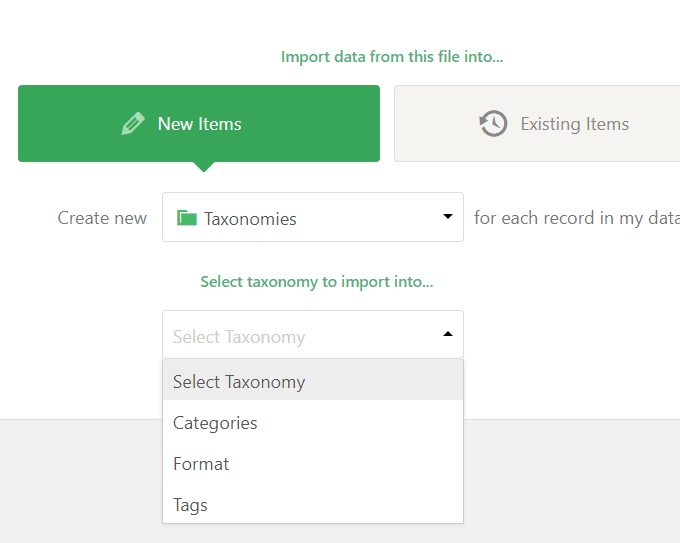
Then select the taxonomy to import into from the 2nd drop down box that appears on the page:

Select Taxonomy

Then in Step 3 of the import process you can drag and drop your import data just like any other import. Supported fields include the name, description, images term meta (custom fields), and the parent term.

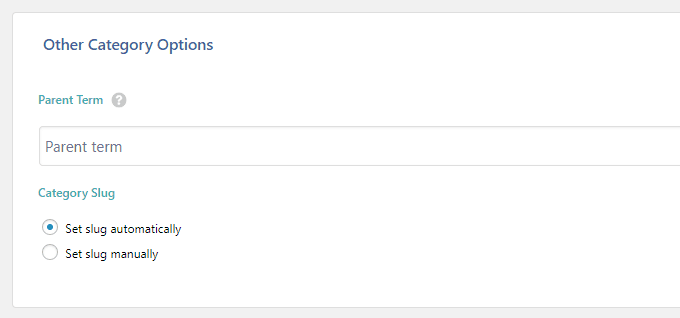
The parent term settings are in the 「Other Category Options」 section:

Other Category Options

And you can also choose whether to manually set the slug for the category, or let a slug be automatically generated.

Note: When importing non-hierarchical taxonomies (e.g. Tags), only the option to set the slug will appear in this section.

Send WordPress Export File to Google Drive using Zapier

Send WordPress Export File to Google Drive using Zapier

Zapier can be used to send an export file to a Google Drive account. Connect Zapier to WP All Export and create the required trigger and action. The trigger would execute whenever a new export is found. The action would be sending the export file towards the Google Drive designated.

Trigger: New Export File in WP All Export Pro

Learn more about connecting to Zapier and setting up the trigger here: https://www.wpallimport.com/documentation/external-app-integration/.

Action: Upload File in Google Drive

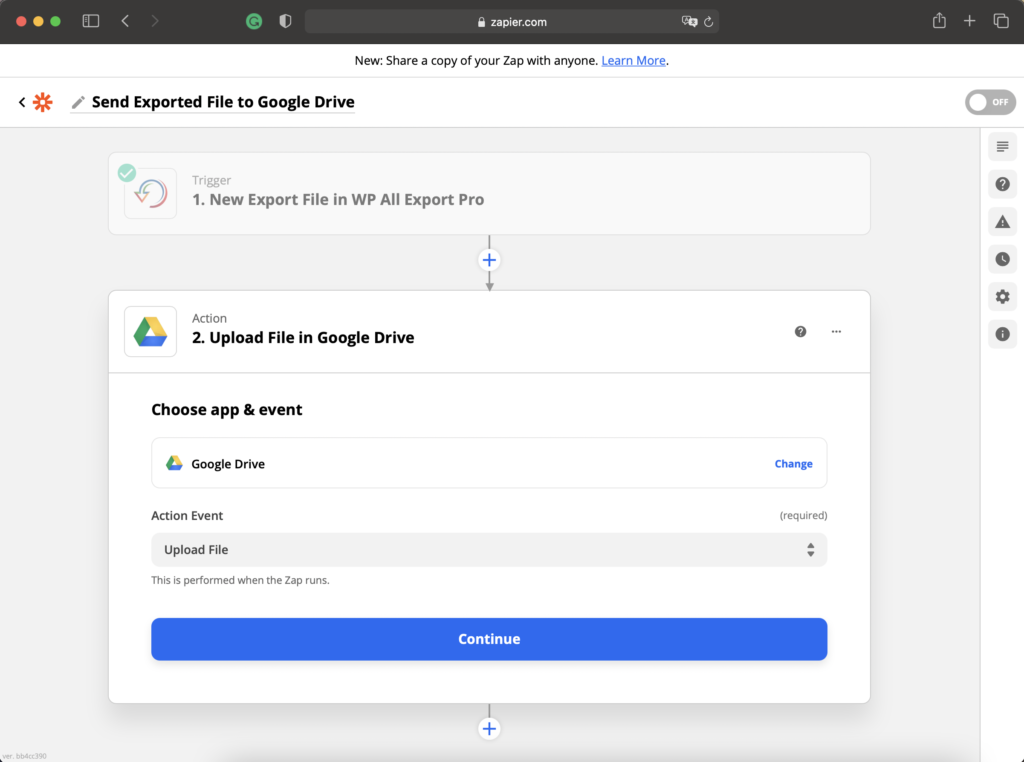
Choose app & event

Zapier will ask to set up an action after the trigger is configured.

Select Google Drive as the app and Upload File as the action event, then click on Continue. This event will upload the export file into the selected Google Drive account.

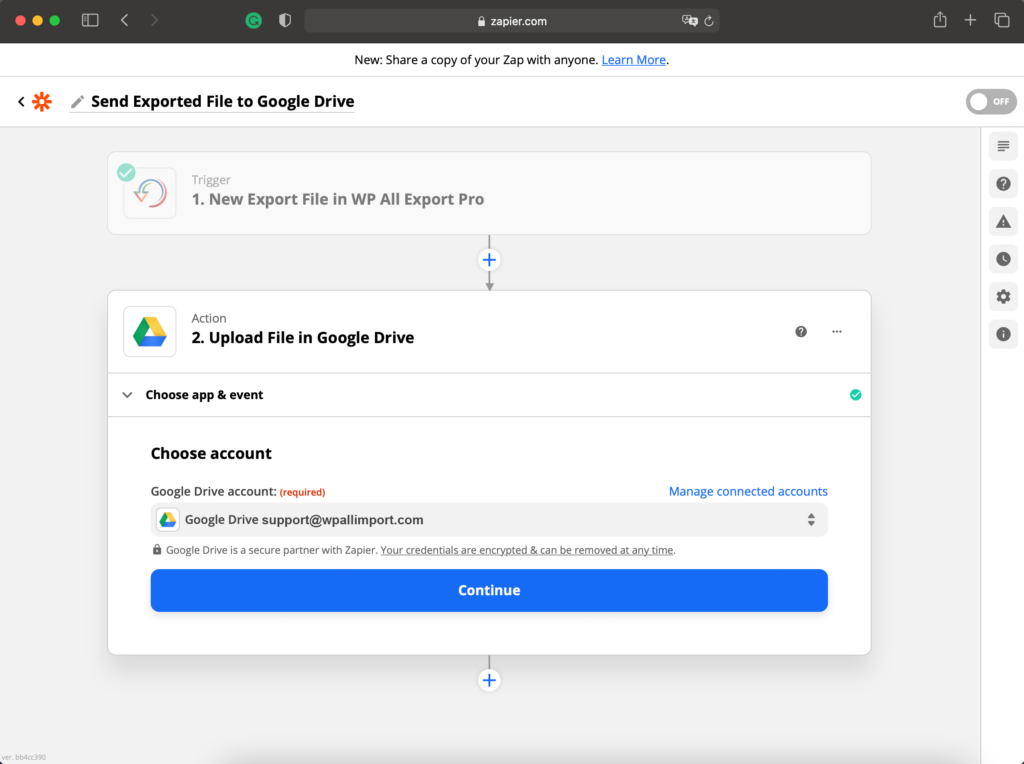
Choose Account

Select the Google Drive account to use. If there's no account added, select + Connect a new account from the dropdown list and follow the steps.

Once an account has been chosen, click Continue.

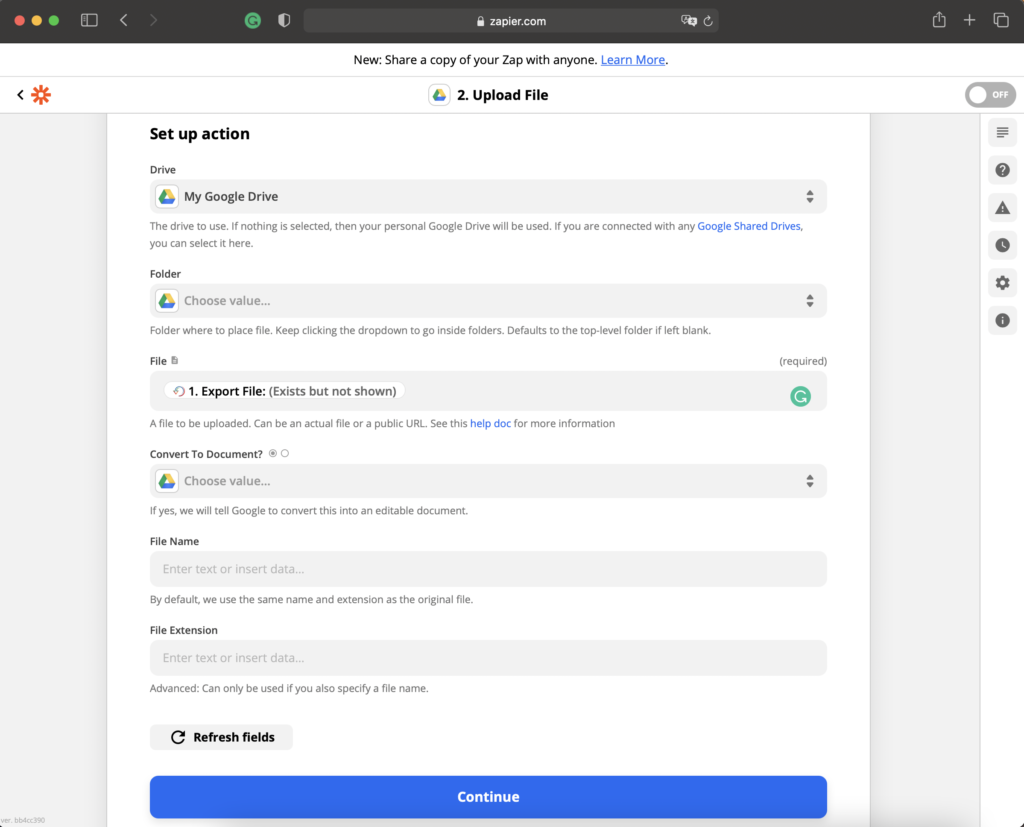
Set up action

This section allows configuring in which Google Drive and folder the export file will be saved.

The following can be configured:

Drive: The drive to use. The personal Google Drive is used by default.Folder: Folder where to place the file. If left blank, defaults to the top-level folder.File: The file to be uploaded. Select Export File from the drop-down list to add the actual export file.Convert To Document?: If enabled, tells Google to convert the file into an editable document.File Name: Define the new file name. By default, uses the original filename.File Extension: Only used if a different filename is specified.

Click Continue to move onto the following step.

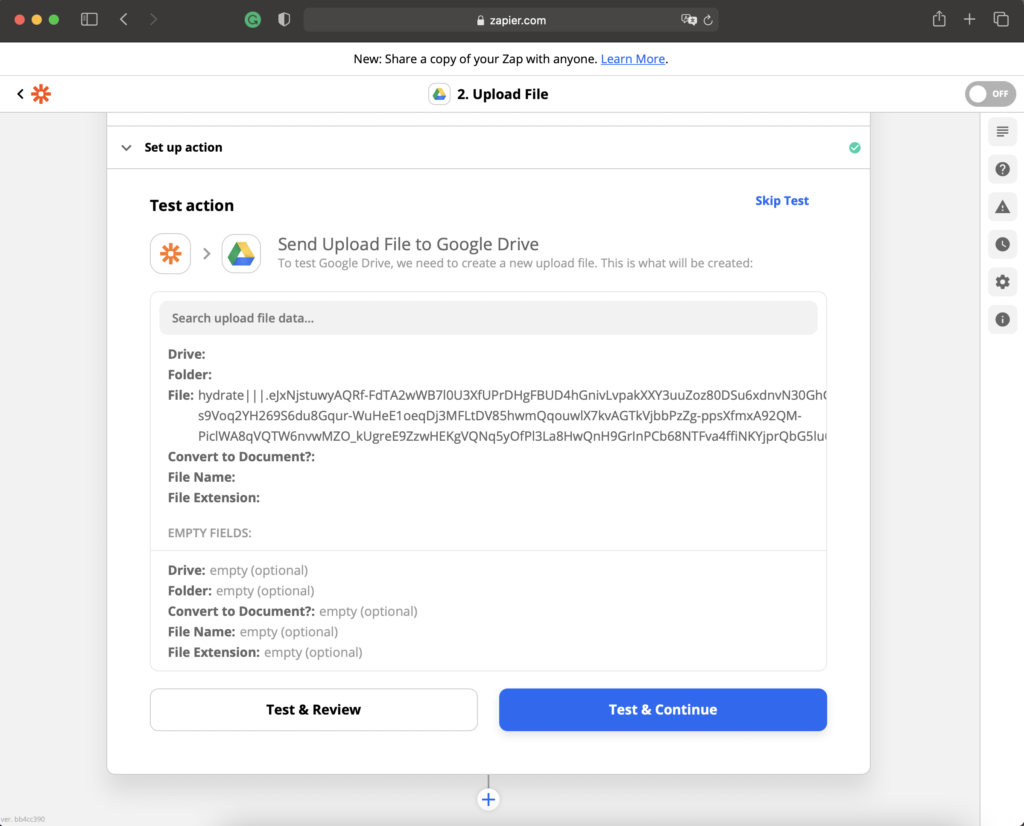
Test action

Once the Google Drive integration has been configured, Zapier will try to test it. Select Skip Test to avoid this step.

Test the newly created Zap by clicking on Test & Continue.

Once the test is done, enable this Zap by clicking on Turn on Zap.

Send WordPress Export File to Dropbox using Zapier

Send WordPress Export File to Dropbox using Zapier

Zapier can send the export file to Dropbox. Connect WP All Export to Zapier and create the required trigger and action. The trigger would execute when a new export is found. The action would be uploading the export file to Dropbox.

Trigger: New Export File in WP All Export Pro

Connect to Zapier and set up the trigger as explained here: https://www.wpallimport.com/documentation/external-app-integration/.

Action: Upload a File in Dropbox

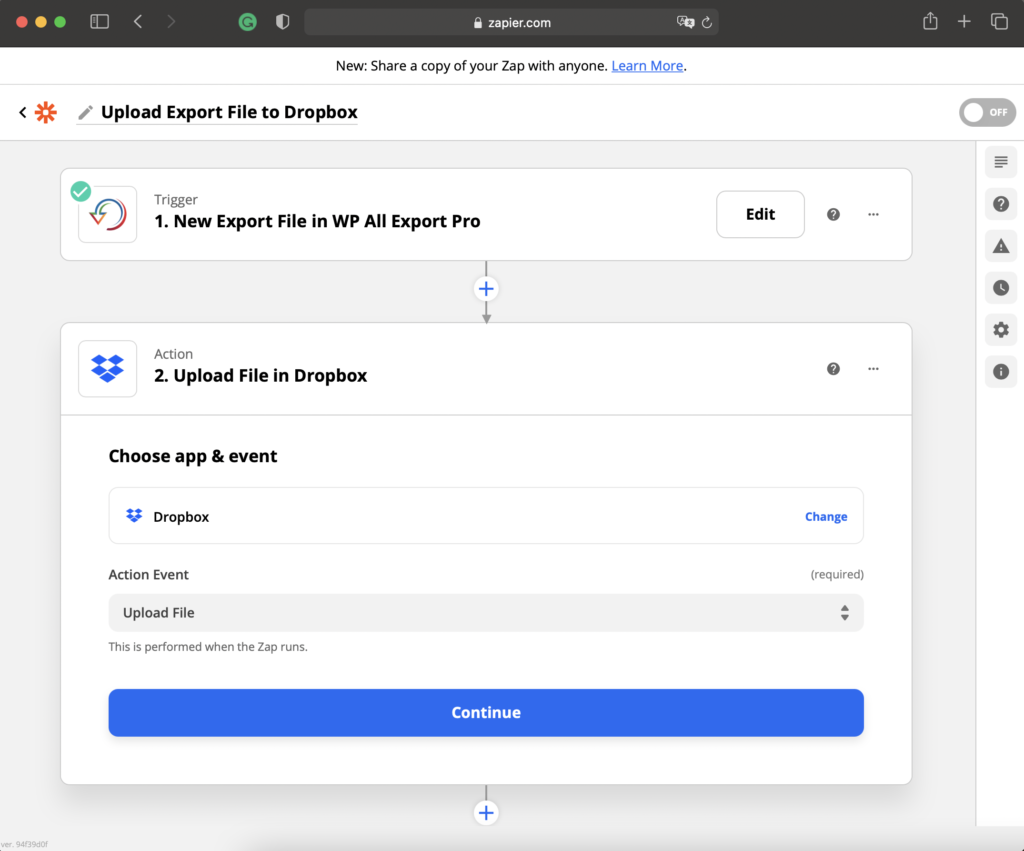
Choose app & event

After the trigger is set up, Zapier will prompt for an app and action.

Select Dropbox as the app, and Upload File as the action event.

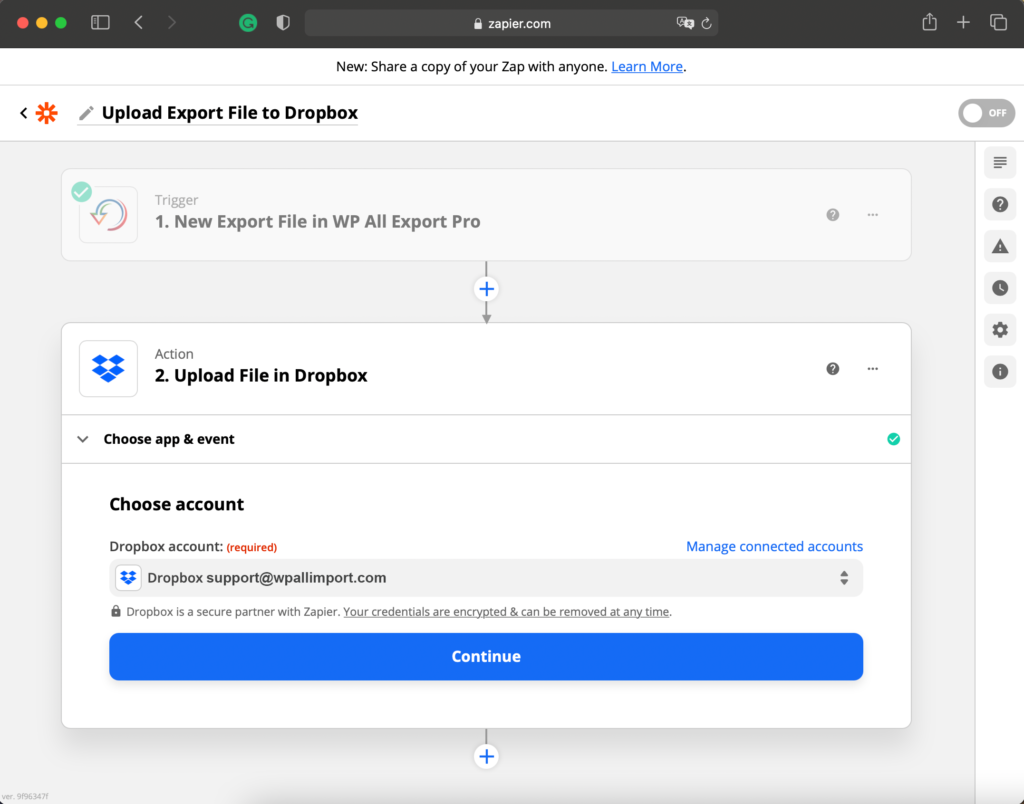
Choose account

In this step, Zapier connects to the Dropbox account where the export file will be uploaded.

If no account has been connected, add one using + Connect a new account from the dropdown list. Click Continue after the account is selected.

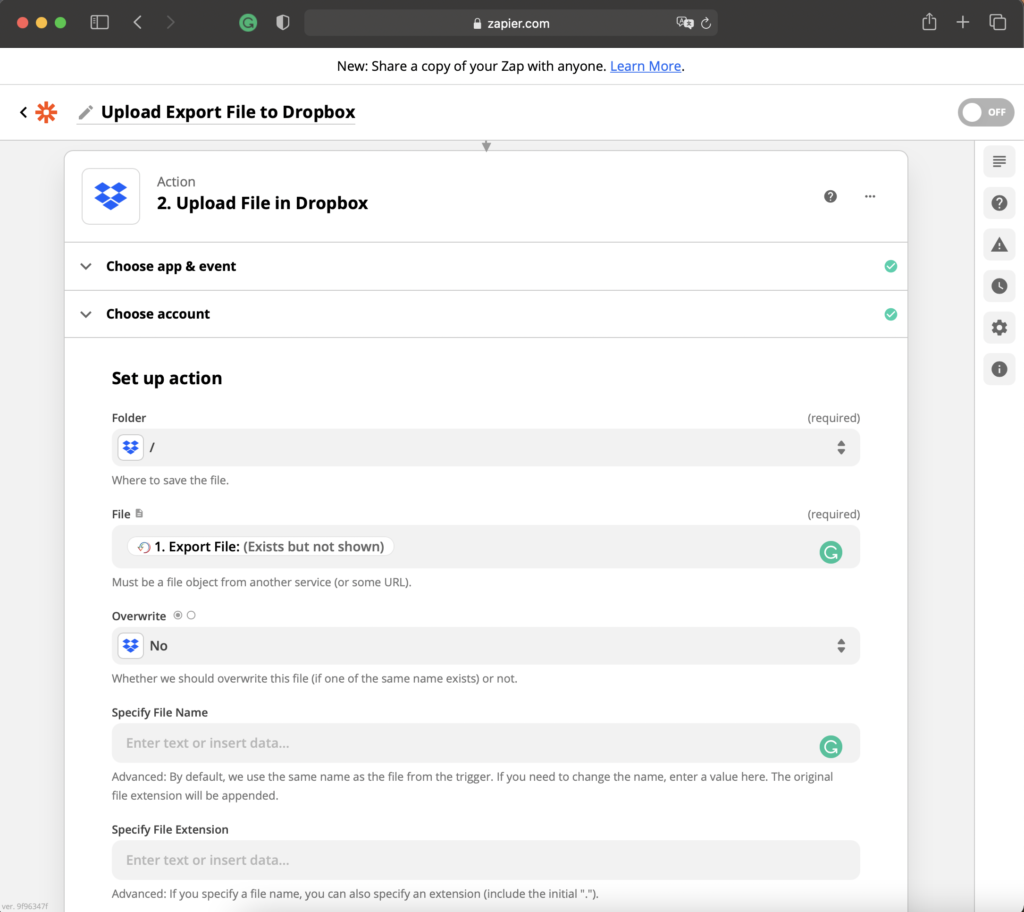
Set up action

Define how the Dropbox action will behave in this section:

The next fields can be configured:

Folder: Where the file should be saved.File: File to save. Select Export File to include the latest export file.Overwrite: If there's an existing file with the same name, should Zapier overwrite it? Defaults to No.Specify File Name: The original filename is kept unless a different name is specified here. The file extension is kept.Specify File Extension: If a different filename is specified, this field allows to define a different file extension.

Once configured, click Continue.

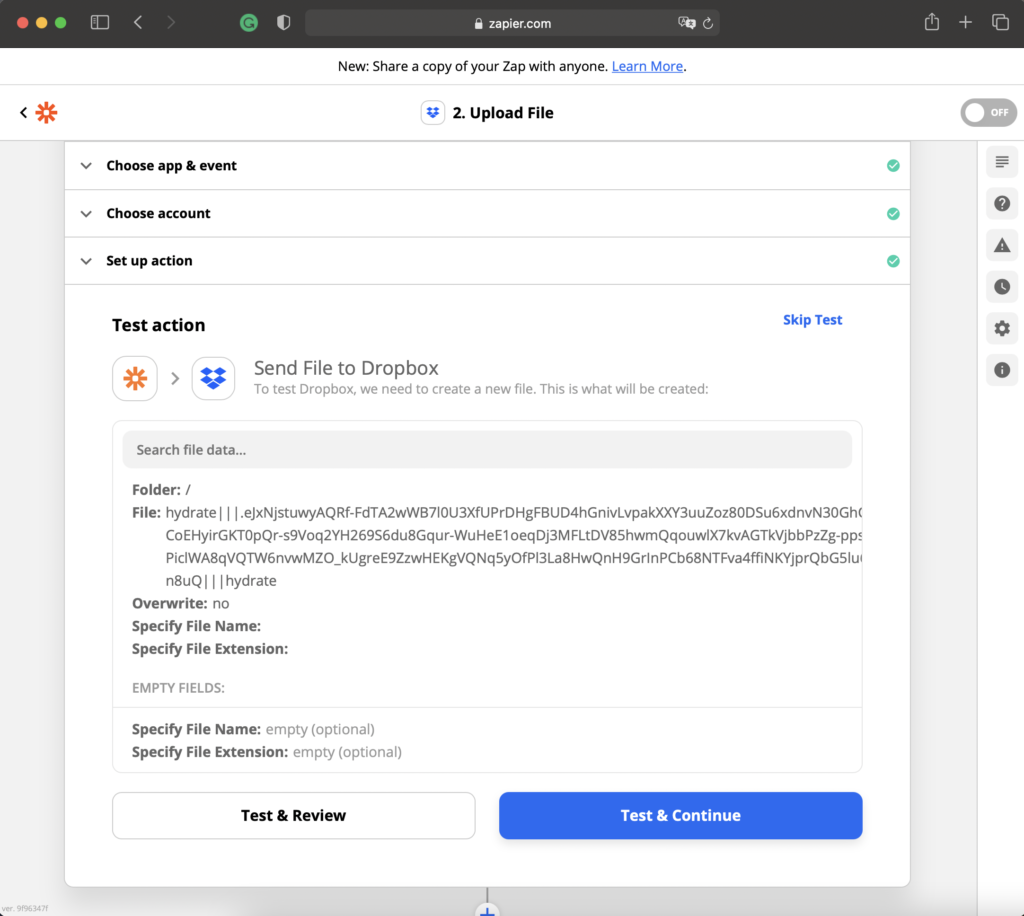
Test action

After the Dropbox action is configured, Zapier will attempt to test it. Click Skip Test to avoid this step, or click Test & Continue to proceed.

Enable this Zap by clicking on Turn on Zap.

Send Exported WordPress Data via Email using Zapier

Send Exported WordPress Data via Email using Zapier

Zapier can be used to send an export file via email. Connect Zapier to WP All Export and create the required trigger and action. The trigger would execute whenever a new export is found. The action would be sending the export file via email using Gmail.

Trigger: New Export File in WP All Export Pro

Learn more about connecting to Zapier and setting up the trigger here: https://www.wpallimport.com/documentation/external-app-integration/.

Action: Send Email in Gmail

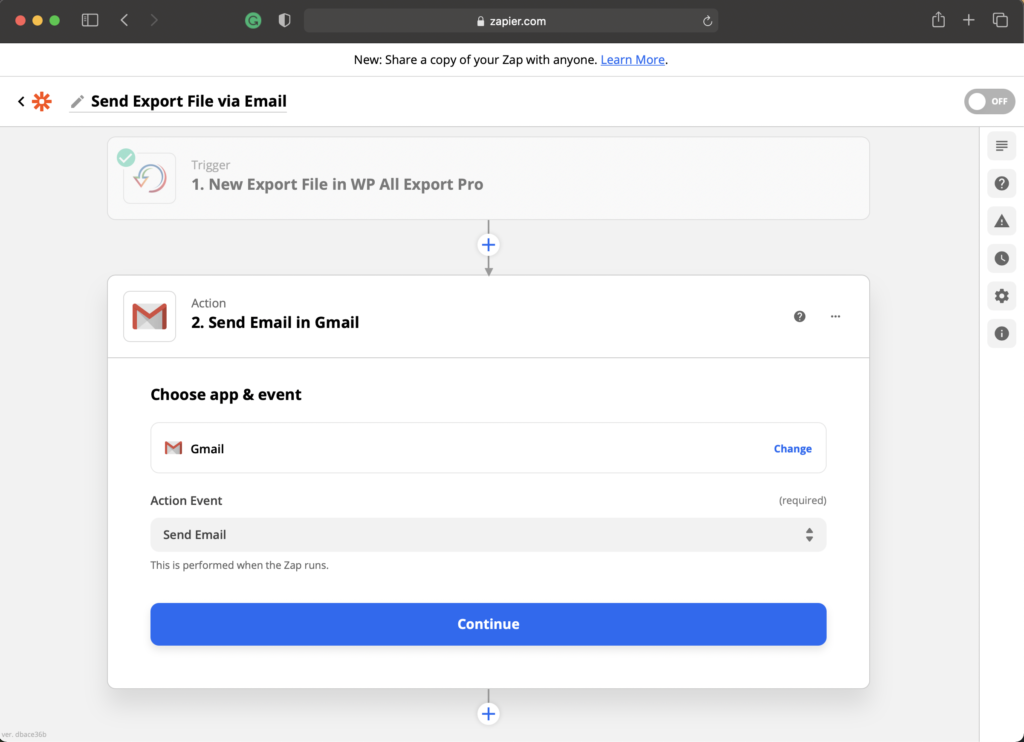
Choose app & event

Once the trigger is configured and tested, Zapier will prompt to select an action.

Choose Gmail as the app and Send Email as the event, then click Continue.

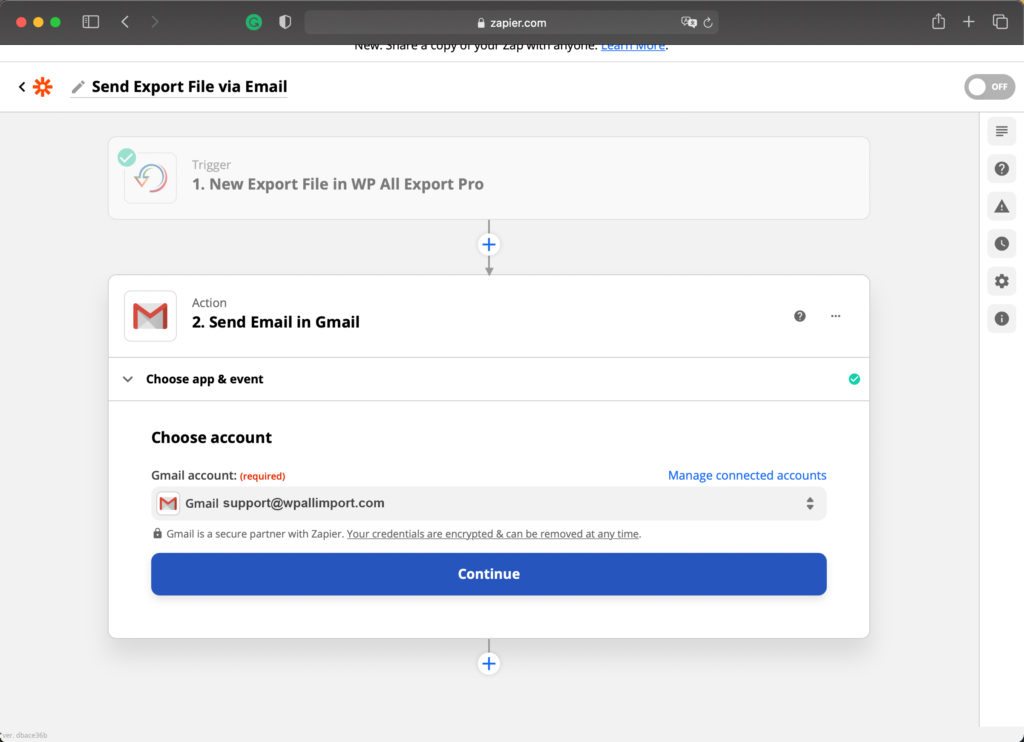
Choose Account

Zapier will ask for the Gmail account to use. If there's no account connected, select + Connect a new account from the dropdown list and follow the steps.

Once the account is selected, click Continue.

Set up action

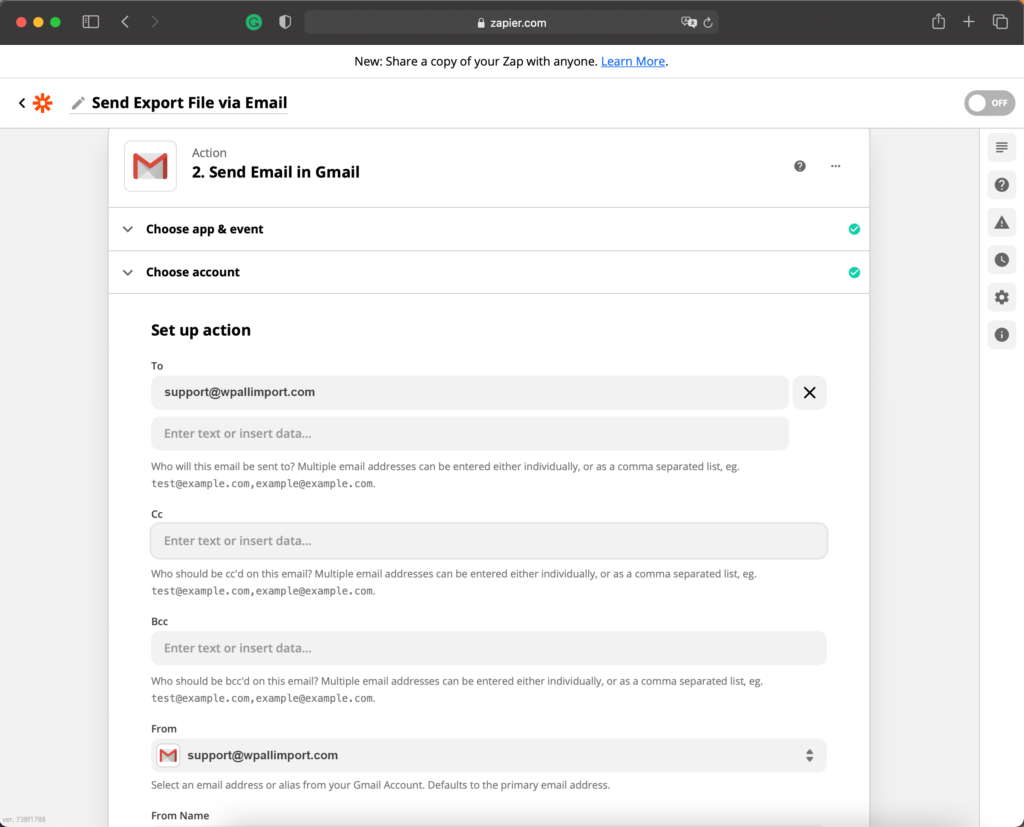
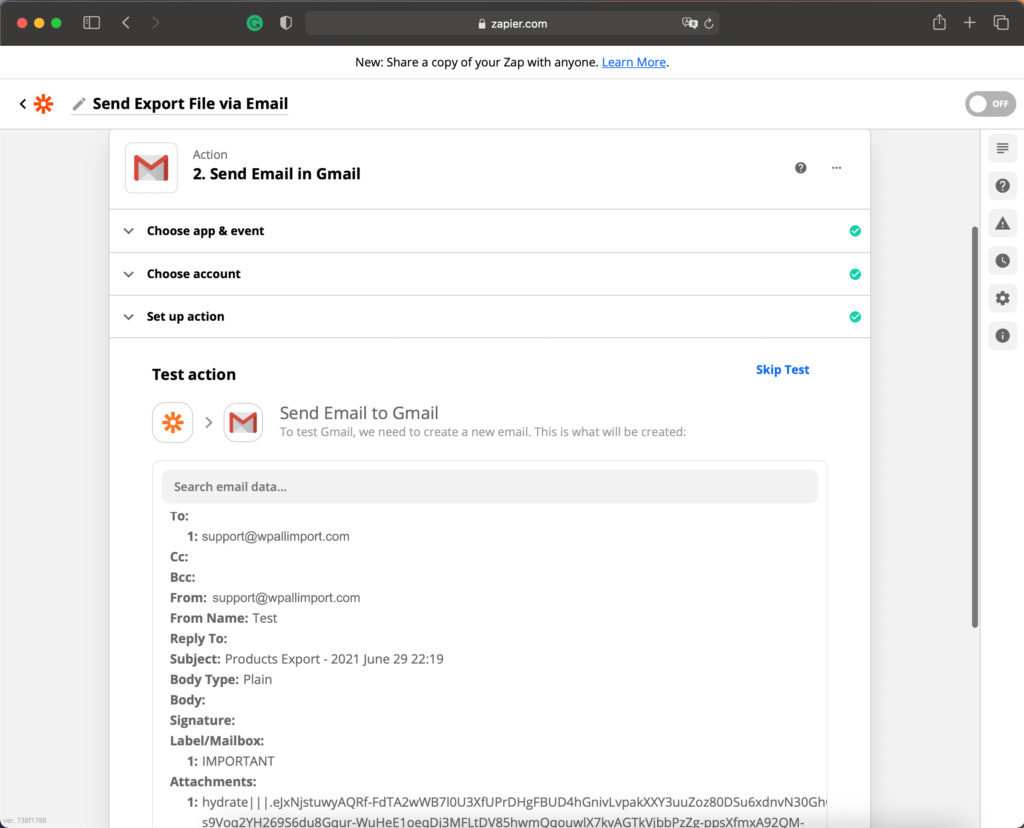
This section allows setting up the email that will be sent.

The following can be configured:

To: Who will this email be sent to? Multiple email addresses can be entered as a comma separated list.Cc: Who should be cc'd on this email? Multiple email addresses can be entered as a comma separated list.Bcc: Who should be bcc'd on this email? Multiple email addresses can be entered as a comma separated list.From: Select an email address or alias from your Gmail Account. Defaults to the primary email address.From Name: Used to define a different "From" name for the email. Reply To: Specify a single reply address other than your own.Subject: Email's subject or title.Body Type: Type of content found in the body, plain or HTML. Body: Body or content of the email.Signature: Include a default signature with the email? Will be placed at end of the message after a line break and another "--" line. Label/Mailbox: Used to define a label to sort the email.Attachments: The file to be attached. Select Export File from the dropdown list to attach the actual export file.

Click Continue to move onto the following step.

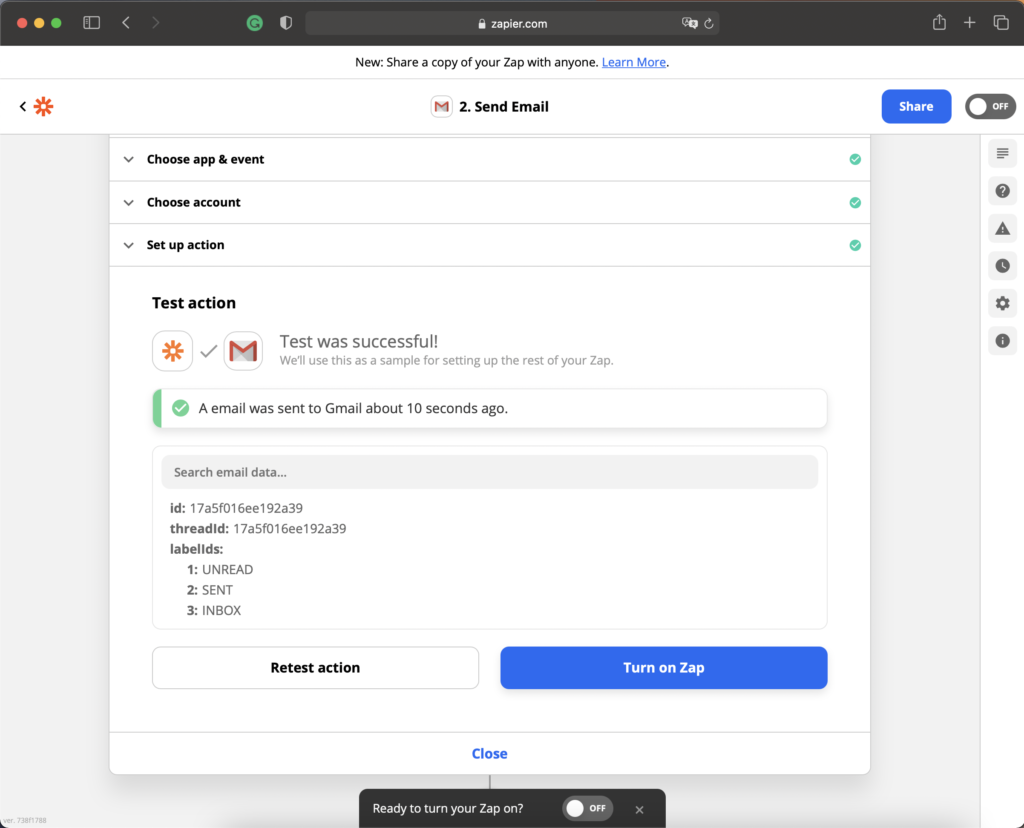
Test action

Once the email has been configured, Zapier will attempt to test the action. Select Skip Test to avoid this step.

Review all information about the email and click Test & Continue.

Once the test has been completed, click on Turn on Zap to enable the newly created zap.

Schedule WordPress Exports Using Cron Jobs

Schedule WordPress Exports Using Cron Jobs

To run a WordPress export on a schedule, create two cron jobs on your server. Set one cron job to run every 2 minutes and execute the processing URL from WP All Export. Then, set up another cron job that executes the trigger URL and runs however often you want the export to run.

Manual Scheduling vs Automatic Scheduling

WP All Export offers two ways to schedule or automate exports. The first option is to manually create the cron jobs in the server. The second option is to use our paid Automatic Scheduling Service, which is integrated within WP All Export and doesn't require any setup. Learn more about Automatic Scheduling.

This guide focuses on Manual Scheduling.

Manual Scheduling Uses Cron Jobs

Cron jobs are like reminders for your web server. When you create a cron job, you are basically telling your server that you want to do a specific thing over and over at specific times.

These cron jobs consist of two things: a time and a command. The way they handle time is a little weird, but there are tools like https://crontab.guru/ that make it easy to understand. When the cron job is triggered, the web server will execute the command you provided. In this case, you'll tell the server to open a URL that will trigger your export to run.

To set up an export with Manual Scheduling, WP All Export actually uses two cron jobs to make sure they run on time and finish the export.

Trigger URLs and Processing URLs

Each scheduled export requires two cron jobs. The first one uses the trigger URL, which will fire whenever you want the export to run. The second uses the processing URL, which will fire every two minutes. Web servers generally don't like processes running in the background for a long time, and will kill them after a few minutes. The processing URL goes through and checks to make sure that your export has completed running. If it hasn't, it will start it up again.

To get your trigger URL and processing, navigate to the Manage Exports page, then click on Scheduling Options:

Once there, select the Manual Scheduling option. There you will find the trigger URL and processing URL. There's also a File URL, and a Bundle URL, used to retrieve the latest export files:

The trigger URL is structured like this: https://[YOUR-WEBSITE].com/wp-load.php?export_key=[YOUR_SECRET_KEY]&export_id=[YOUR_EXPORT_ID]&action=trigger

The processing URL is structured like this:https://[YOUR-WEBSITE].com/wp-load.php?export_key=[YOUR_SECRET_KEY]&export_id=[YOUR_EXPORT_ID]&action=processing

Your secret key can be accessed and reset from All Export › Settings.

The trigger cron should be set to run however often you want your export to run.

The processing cron should be set to run every two minutes.

Example Cron Jobs

You should be able to create your cron job in your web hosting control panel. To create a cron job that hits the cron URLs, commonly the wget command is used.

wget -q -O - /dev/null "https://example.com/wp-load.php?export_key=ph2Pyi_dMN&export_id=1&action=trigger"
wget -q -O - /dev/null "https://example.com/wp-load.php?export_key=ph2Pyi_dMN&export_id=1&action=processing"

Alternatively, you can use cURL.

curl -s "https://example.com/wp-load.php?export_key=ph2Pyi_dMN&export_id=1&action=trigger" > /dev/null
curl -s "https://example.com/wp-load.php?export_key=ph2Pyi_dMN&export_id=1&action=processing" > /dev/null

Please note that in both cases, the URLs need to be in quotes. Here's how these cron jobs would look in cPanel:

Get Help From Your Host

If you're not sure how to create these cron jobs manually, your web host support team will be able to set them up for you. Here's an e-mail template you can use:

Please set up two cron jobs.

CRON JOB 1
Fetch this URL every 24 hours:
https://[YOUR-WEBSITE.com]/wp-load.php?export_key=[YOUR_SECRET_KEY]&export_id=[YOUR_EXPORT_ID]&action=trigger

CRON JOB 2
https://[YOUR-WEBSITE.com]/wp-load.php?export_key=[YOUR_SECRET_KEY]&export_id=[YOUR_EXPORT_ID]&action=processing

If your web host doesn』t have a cron feature, you can use an external service such as EasyCron.

Call Cron URLs from the Command Line

You can also call the WP All Export cron URLs from the command line. This may be necessary if your site's configuration doesn't allow inbound calls to the regular cron URLs.

It'd look something like this:

/path/to/your/php-cgi /path/to/your/wordpress/install/wp-load.php export_key=[YOUR_EXPORT_KEY] export_id=[YOUR_EXPORT_ID] action=trigger
/path/to/your/php-cgi /path/to/your/wordpress/install/wp-load.php export_key=[YOUR_EXPORT_KEY] export_id=[YOUR_EXPORT_ID] action=processing