How to Map Custom Fields

How to Map Custom Fields

Mapping is used when the value you need imported to your site is different than the value in your file. A visual interface is available for mapping for Custom Fields and Custom Taxonomies. To map elsewhere, you can use a custom PHP function.
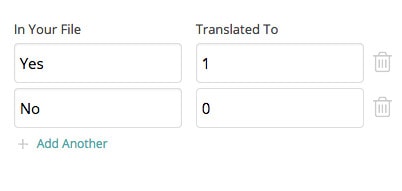
Visual Mapping Tool

For example, you may have a file with product categories that are written in Dutch, but you want to import these products to categories that already exist on your site with English names.

Or, your theme or plugin requires the value of a Custom Field it uses be either 1 or 0, but in your XML or CSV file, the values are expressed as Yes or No.

You need to map the values in your file to the values you actually imported to your site.

Example – Mapping For A Dropdown

In the previous article, Importing to Theme & Plugin Fields, we explained how to detect the fields used by your theme or plugins, and their possible values.

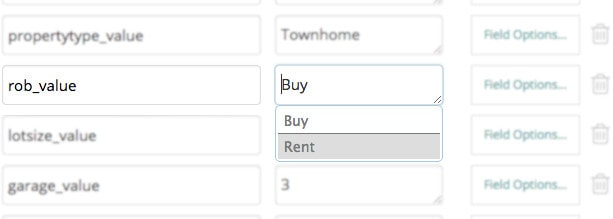
Our theme has a dropdown to specify whether a Property Listing is for rent, or for sale.

Rent or Buy Example

The field name is 「rob_value」, and the possible values, as stored in the database, are 「Rent」 and 「Buy」.

Field Example

Note: You can see the values as they are stored in the database by clicking inside the Value textbox for the 「rob_value」 field in WP All Import. The values stored in the database may not be the same as values shown inside the select box in the theme. We must map to the values as they are stored in the database.

Our XML file has a element that is set to FORSALE if the property is for sale (Buy), and FORRENT if the property is for rent (Rent).
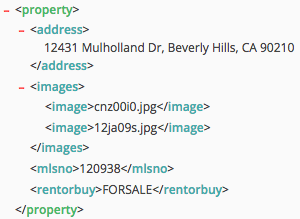
XML Data

Without mapping, simply dragging & dropping to the Value box for rob_value would not work, because the value of is not correct for our theme.

To solve this problem, we use the Mapping feature.

Mapping

Click Field Options… and then click Mapping.

A dialog box will pop up allowing you specify the mapping rules.
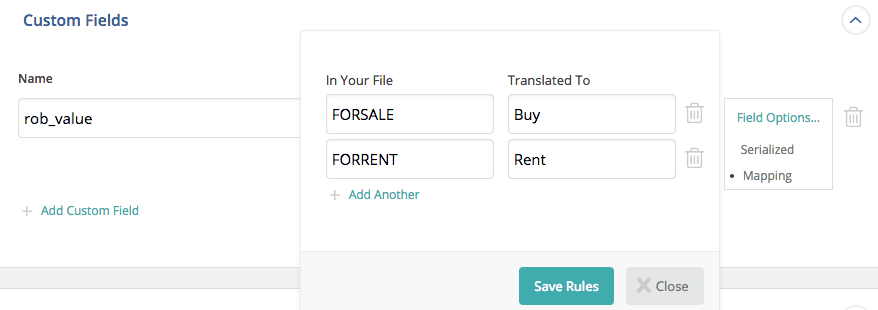
Mapping Rules Example

Now, when the import is run, FORSALE in your file will be translated to Buy, and FORRENT in your file will be translated to Rent, so your data will be imported correctly, as per the requirements of your theme and plugins.

Serialized Fields

Serialized Fields

If you aren』t a developer and don』t know what 「serialization」 is, this article will probably be over your head.

Developers, read on…

In very rare cases, some themes store multiple data points in a single field. Themes shouldn』t do this. It』s not nice, and the practice is generally frowned upon. But, some do. These fields are often called 「serialized」 fields.

Serialized Selected

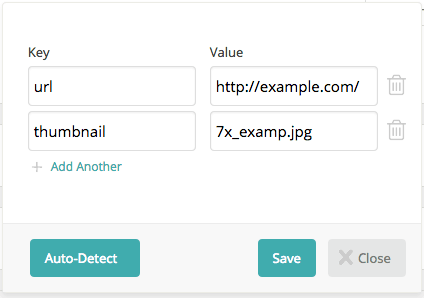
Serialized Dialog

You can either use the serialization feature in WP All Import to import the key and value pairs, or you can use a custom PHP function to return the value in the proper format needed by your theme or plugin.

The Serialize feature generates an array with the key => value pairs you specify, and then returns the serialize()』d value of the array.

Overview

Overview

In this tutorial you』ll learn how to use WP All Import to import data from your XML or CSV into any plugin or theme.

Many themes and plugins have 「custom」 places to enter in data – not just the post title and content boxes on normal Posts or Pages.

The technical term for these extra fields is Custom Fields or post meta.

WP All Import has full support for Custom Fields and can even auto-detect the names of the fields used by your themes and plugins so you don』t have to ask the author, guess, or look at any code.

Watch the video tutorial below to see how easy it is:

Auto-Detecting The Fields

For WP All Import to detect a field, it must exist at least once in your database in a published post (not draft or any other post status).

If you already have posts on your site that have the fields you want to import to filled out, WP All Import will detect the fields.

If not, simply create a dummy post, enter in dummy values for the fields you want to import data to, then publish it.

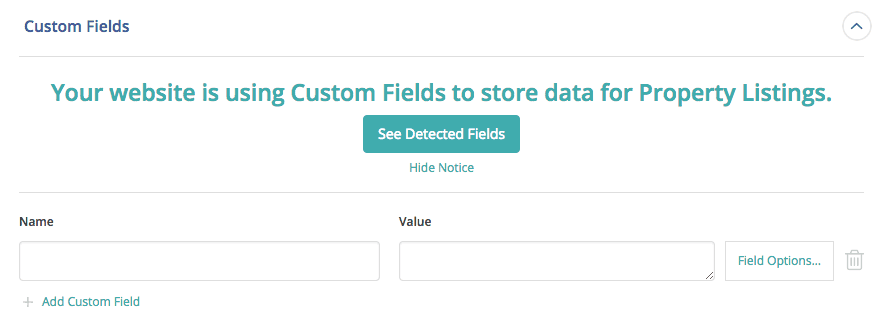
Click See Detected Fields to see the detected fields.

See Detected Fields

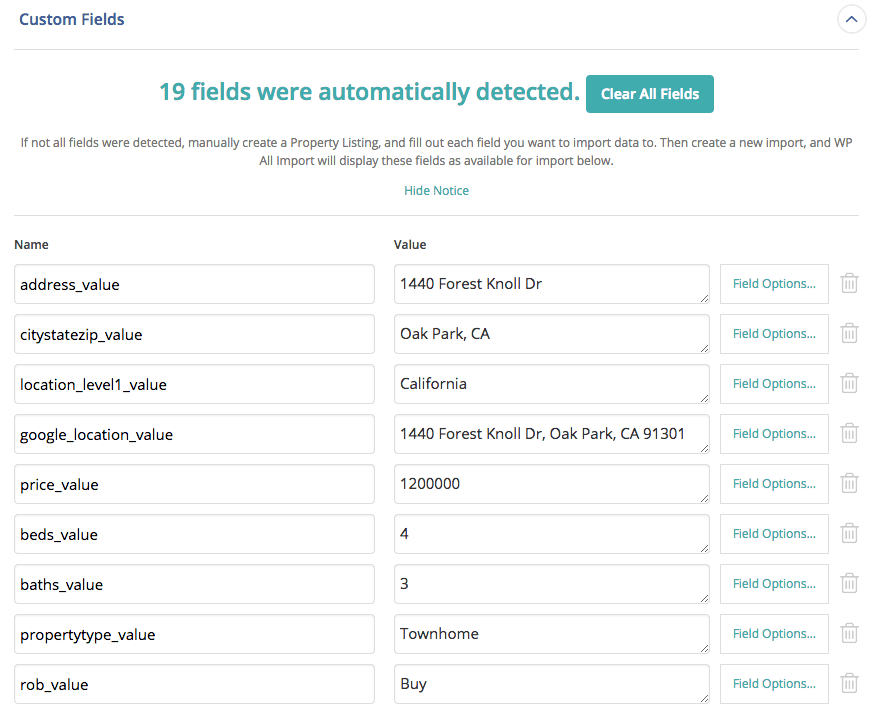
Once you click See Detected Fields, WP All Import will show you all of the detected fields.

Populated Detected Fields

WP All Import can also show you the different possible values for your fields. So for example, if you need to know what the possible values of a 「select」 option is, just manually create a post with the 「select」 option in every state you want to know the field value for.

Example – Select Box In OpenDoor Theme

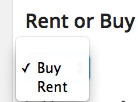
Rent or Buy Select Field

Saving two posts, one with the select set to 「Rent」 and the other with the select set to 「Buy」, results in WP All Import auto-detecting the possible values:

Of course, you can import to fields without WP All Import auto-detecting their names and values – you just have to know the names and possible field values yourself.