To export WordPress data to CSV, Excel, or XML, go to WP All Export › New Export and select the type of data you'd like to export. Next, drag and drop the post data to set up your export file. Then run the export to create your customized WordPress export.

Step 1: Select a WordPress Post Type to Export
First, choose the type of data that you would like to export. WordPress separates data into different post types like posts, pages, WooCommerce products, real estate properties, etc. You can export any custom post type or taxonomy by selecting it here.

Step 2: Customize Your WordPress CSV/XML Export
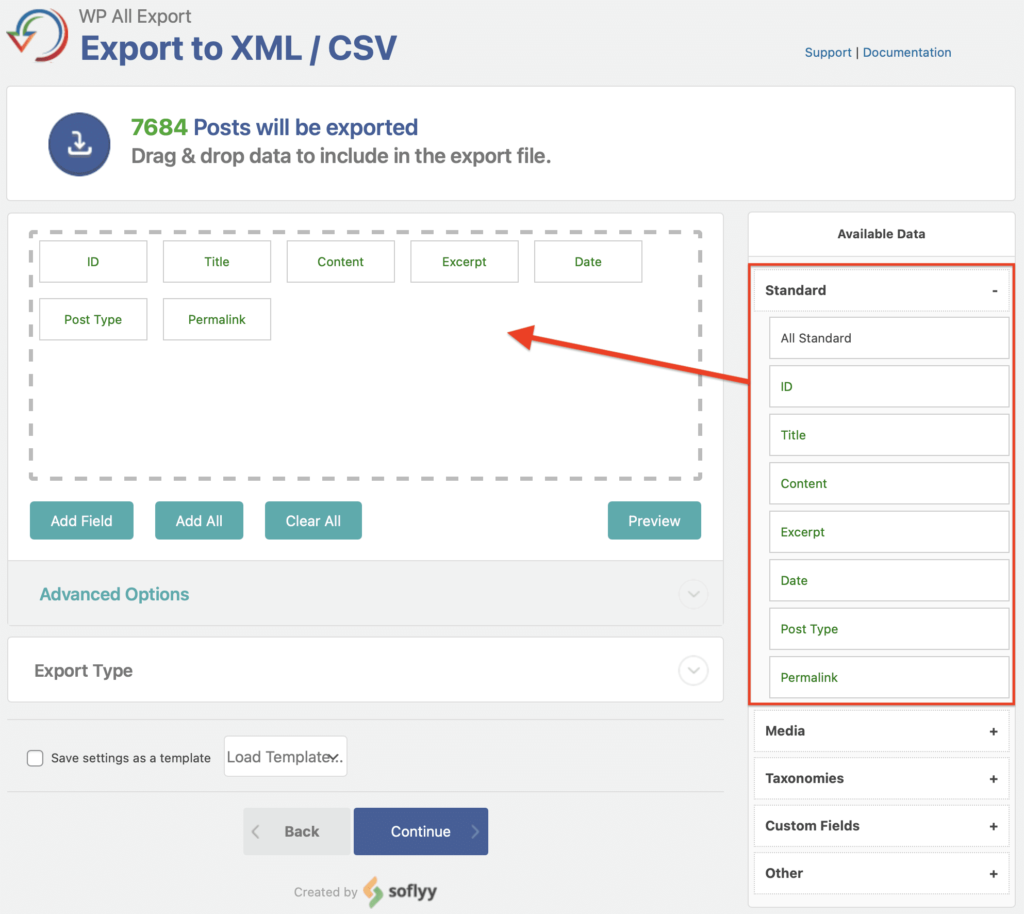
The fields available to export are listed on the right. Drag and drop individual fields, or click Add All to export everything. Move export fields around to reorder the spreadsheet columns. Click to rename individual elements, combine multiple fields, and more.
Everything is available for export, including media, images, categories and tags, custom fields, etc. Things like WooCommerce, real estate plugins, Yoast, and ACF, have custom data that can be exported.

Step 3: Confirm and Run Your Export
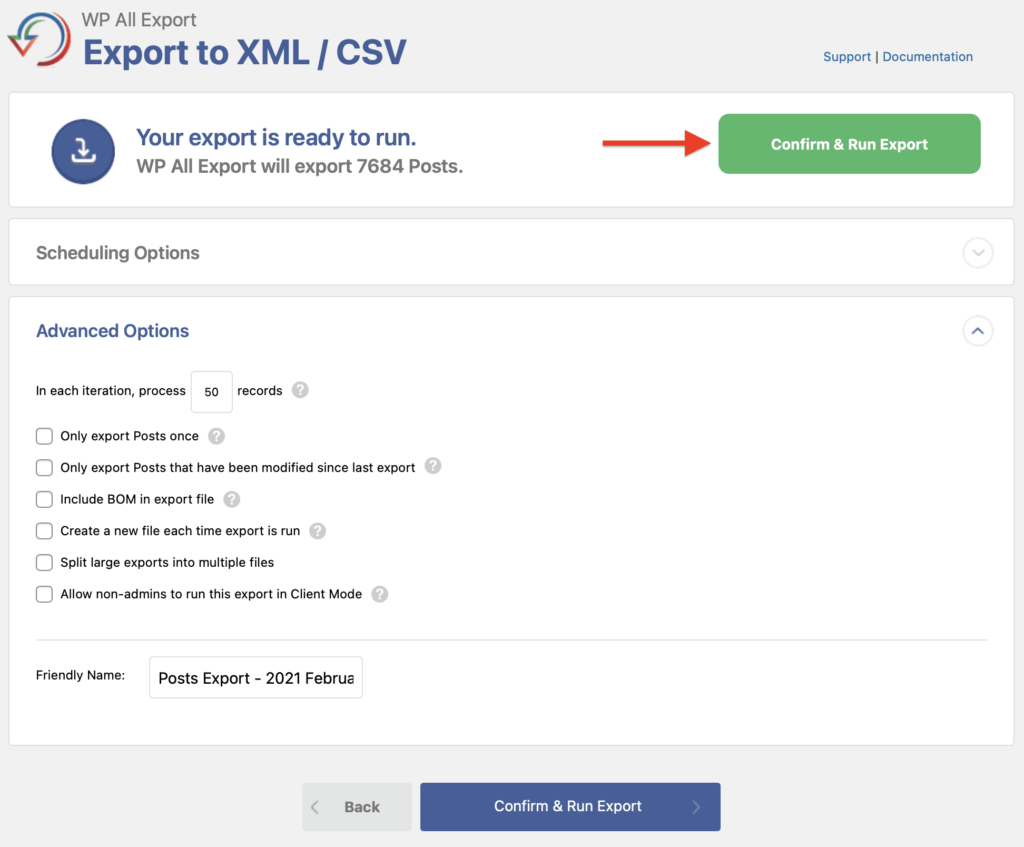
When you have finished selecting the data to export, click Continue to verify your export settings. Click Confirm & Run Export when you're ready to run your export.

Step 4: Download Your WordPress CSV/XML Export
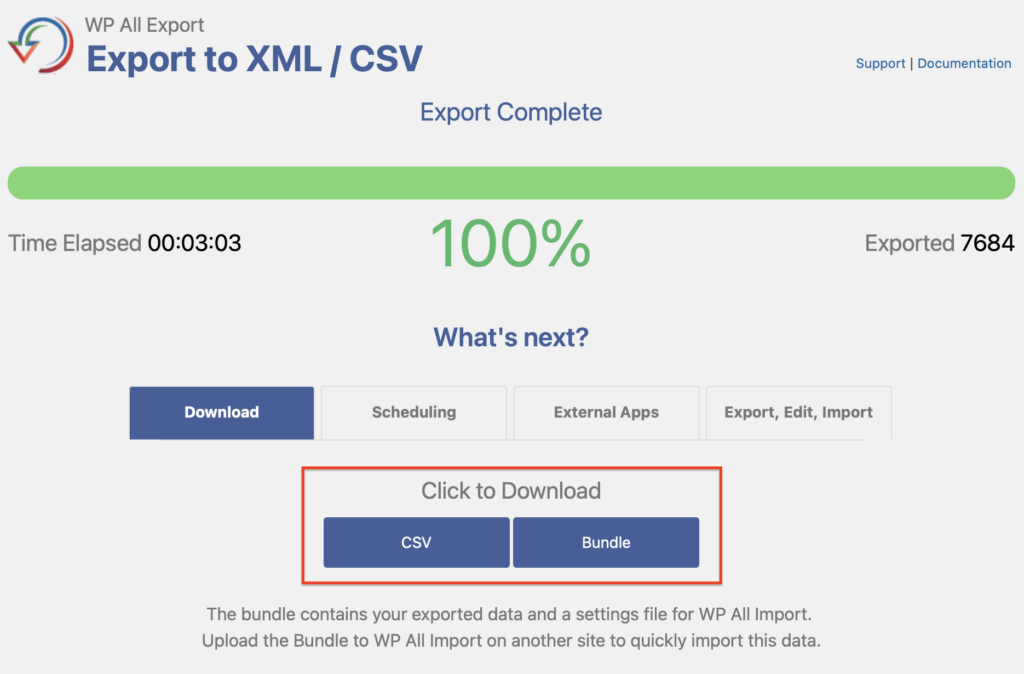
After the export finishes, you'll be able to download the generated file. At this point you can choose to migrate this data to another WordPress install, edit it in Excel and import it back to this WordPress install, run this export on a schedule, or send the data to Dropbox, Google Drive, email, and over 1000+ other external apps via Zapier.


